
Have you ever stared at that slope in your garden and wondered how to keep the soil from washing away without breaking the bank? You’re not alone.
This post will guide you through the process of how to build a retaining wall with inexpensive materials, ensuring effective drainage and a stunning garden feature. We’ll cover selecting cost-effective materials, the tools you’ll need, and a step-by-step construction guide.
By the end, you’ll have practical, inexpensive retaining wall ideas that prevent water erosion and enhance your outdoor space. Let’s turn that problem area into a highlight of your home’s landscape.
How to Build a Retaining Wall: Create a Strong, Lasting Feature
Understanding Retaining Walls and Their Benefits
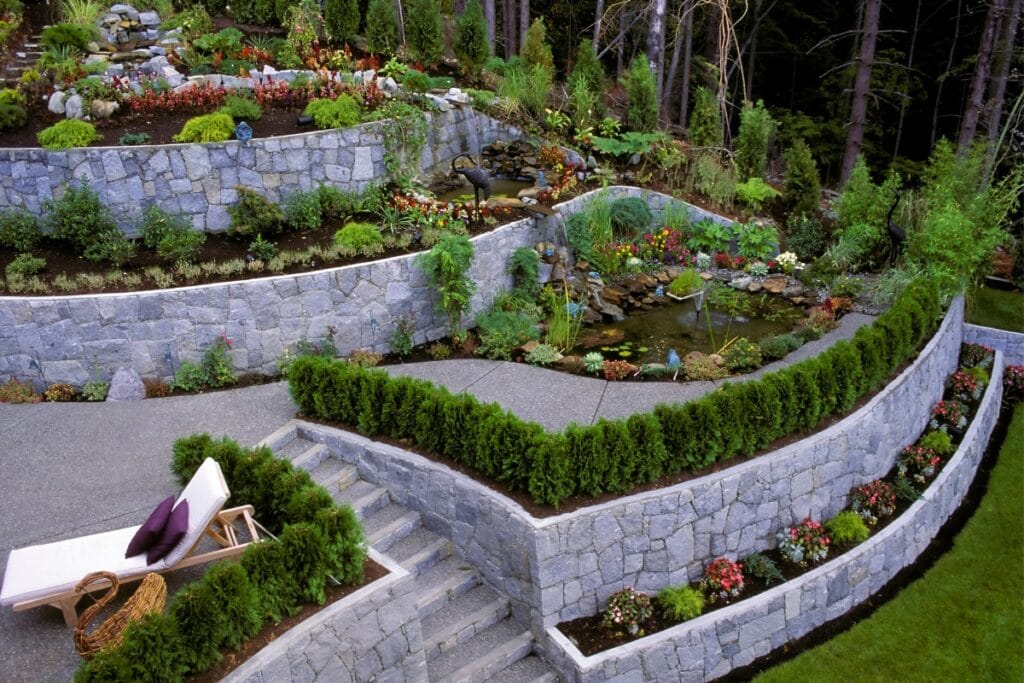
Think of a retaining wall as the backbone of your lawn, a sturdy structure that holds back earth and carves out a space for your outdoor dreams. Using materials like concrete block, you can create a functional and aesthetically pleasing barrier that enhances your yard.
In the upcoming sections, we’ll dive into the purpose of a retaining wall and the advantages it brings to your outdoor space, showing you how to elevate your home’s exterior without breaking the bank.
The Purpose of a Retaining Wall
When you’re eyeing that slope in your backyard, you might be wondering how to keep the soil in place and your plants thriving. That’s where a retaining wall steps in: it’s a practical solution designed to prevent erosion by holding soil back, especially in areas where a sudden drop or a steep incline exists.
By using materials like wood or brick, you can construct a wall that not only serves its purpose but also adds a touch of class to your outdoor space.
Imagine you’ve got a beautiful tree that’s struggling because the soil around it keeps washing away, or maybe you want to create a leveled area for a light summer gathering.
A retaining wall can be your hero, providing the support needed to maintain soil levels and protect your landscaping investments. Plus, it’s a chance to get creative with inexpensive materials, crafting a feature that’s both functional and eye-catching:
Advantages for Your Outdoor Space
Let’s talk about how a retaining wall can seriously up your outdoor game. Picture this: you’re using budget-friendly lumber or pavers to create a stunning feature that not only holds back soil but also carves out the perfect spot for your garden or patio.
It’s a win-win; you get to prevent erosion and add a dash of charm to your yard without draining your wallet.
Now, imagine using rocks or even railroad ties to give your space that rustic, timeless look.
These materials are not just easy on the pocket, but they’re also super durable, meaning your retaining wall will stand strong against the elements, keeping your soil right where it should be. You’re crafting a space that’s as sturdy as it is stylish, and that’s something to be proud of.
Now you grasp the strength of retaining walls. Let’s talk cost-effective strategies to build your own.
Planning Your Affordable Retaining Wall Project
Ready to transform your outdoor space with a retaining wall that’s both easy on the wallet and a cinch to build? Let’s get into the nitty-gritty of planning. You’ll need to assess your landscape and soil type to ensure your wall stands strong.
Then, it’s time to sketch out the size and design that will complement your patio or plant beds perfectly. And don’t forget, checking local regulations and securing the right permits is key to keeping your project on the up and up.
Evaluating Your Landscape and Soil Type
Before you start stacking pallets or laying bricks, take a good look at your yard. You need to understand the lay of the land and what’s beneath the surface.
If you’re dealing with a slope, you’ll want to consider the angle and stability before you design your retaining wall. And let’s talk soil – sandy soils drain well but may shift, while clay holds its shape but retains water.
A layer of gravel behind your wall can help with drainage and keep things stable, so keep that in mind when planning.
As you envision your landscape transformation, remember that the type of soil in your yard will influence your retaining wall design. You want a wall that’s not just pretty but also practical, right?
So, if your soil is on the softer side, you might need to dig a little deeper for a solid foundation. It’s all about creating a balance that works with your landscape, ensuring your wall stands the test of time and enhances your outdoor space just the way you imagined.
Determining the Wall’s Size and Design
When you’re sizing up your space for a retaining wall, think about the big picture. You want to choose a size that fits well with the scale of your yard and your hardscape ambitions.
If you’re leaning towards a natural look, fieldstone is a fantastic, budget-friendly option that blends seamlessly with the surroundings. It’s all about finding that sweet spot where form meets function, ensuring your wall is tall enough to hold back the soil but not so imposing that it overshadows your vibrant green wall or the delicate tendrils of a climbing vine.
During construction, it’s crucial to consider the wall’s design in relation to the rest of your outdoor space. A curved wall might offer a softer, more organic feel, while straight lines can give a sense of order and tidiness.
Remember, the design you choose has to do more than just look good; it needs to stand up to the pressures of the earth it’s holding back. So, roll up your sleeves and get ready to create a hardscape feature that’s as sturdy as it is stunning, enhancing your outdoor space in a way that feels like you’ve always imagined it could be.
Checking Local Regulations and Permits
Before you start piecing together your gabion masterpiece or stacking blocks to combat erosion, you’ve got to hit the books – or at least the local zoning office. You see, each area has its own set of rules when it comes to building structures like retaining walls.
You don’t want to pour your heart into creating the perfect backdrop for your shrubs and outdoor furniture, only to find out you’ve crossed a line you didn’t know was there. So, make sure you’re in the clear with permits and regulations to keep your project and your conscience as solid as your new wall.
Now, let’s talk cost – not just the price of materials, but the potential fines for skipping the permit process. It’s like this: you wouldn’t drive without a license, so why build without approval?
Getting the green light from your local authorities means you can confidently construct that erosion-stopping, shrub-hugging, furniture-complementing wall without the worry of legal hiccups. It’s a small step that can save you a big headache and keep your wallet from taking an unexpected hit down the road.
You’ve mapped out the blueprint for your retaining wall, its purpose clear and its design solid. Let’s turn to the materials—durable, cost-effective choices that stand the test of time and weather.
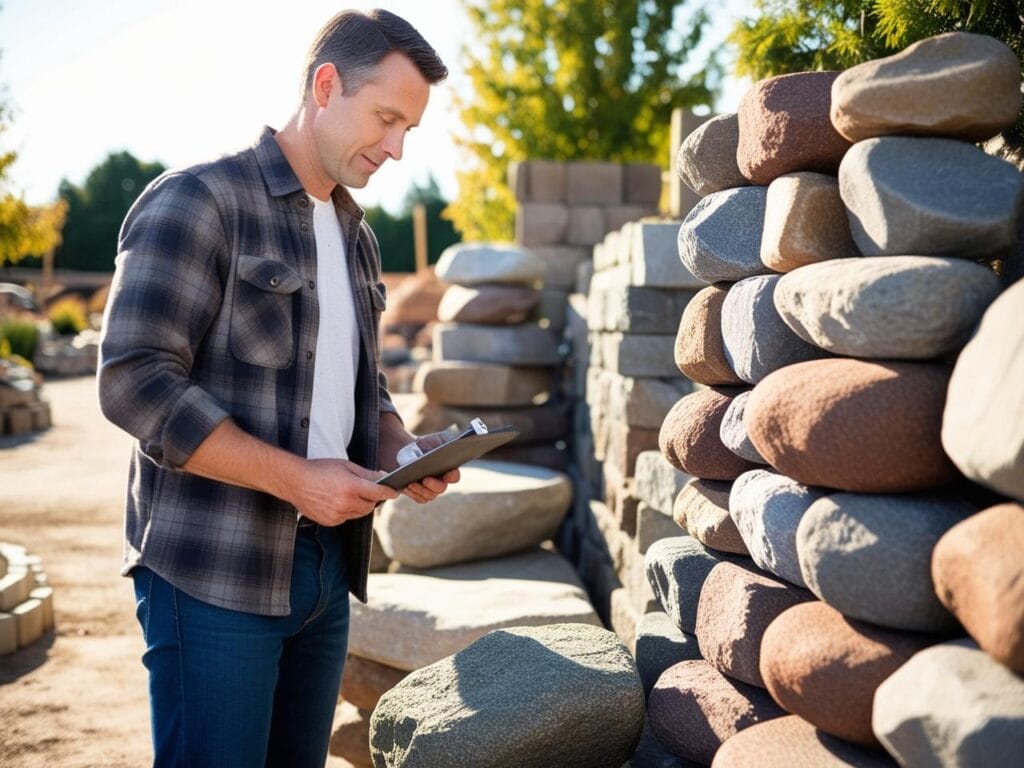
Selecting Cost-Effective Materials
So, you’re set on building a retaining wall and want to keep costs down? Smart move. Let’s look at using recycled or reclaimed materials that add character without the hefty price tag.
If you’re considering timber, there are inexpensive options that still stand up to the task. Concrete blocks or bricks offer a classic look and are known for their durability.
And for something a bit different, gabion walls filled with affordable materials can create a unique, industrial vibe in your landscape design. Each choice has its perks, whether you’re reinforcing a garden design or simply adding a stylish fence to your yard.
Using Recycled or Reclaimed Materials
Hey, if you’re looking to add a unique twist to your outdoor space, why not consider using recycled or reclaimed materials for your retaining wall? Not only does this approach support sustainability, but it can also save you a pretty penny.
Imagine repurposing old bricks from a demolished building, giving them new life as a sturdy wall that defines your vegetable garden or frames a cozy fire pit. It’s a smart move that marries cost-effectiveness with eco-friendliness, and you’ll be the architect of a space that tells a story with every stone and brick.
Think about it, using reclaimed timber can add a rustic charm to your driveway border without the need for expensive mortar. You’re not just building a wall; you’re crafting a conversation piece that’s as functional as it is fascinating.
Plus, you’ll feel good knowing that you’re reducing waste and contributing to a greener planet. So, roll up your sleeves, and let’s get creative with materials that are as kind to your wallet as they are to the earth.
Opting for Inexpensive Timber Options
When you’re on the hunt for materials to build a retaining wall that’s both sturdy and won’t break the bank, timber is your go-to. It’s a cost-effective option that can give your outdoor space a warm, natural feel.
Plus, timber is versatile; whether you’re lining a garden bed or framing a new outdoor countertop, it can be easily cut and shaped to fit your vision. And if you’re environmentally conscious, you’ll be glad to know that timber is a renewable resource, making your choice as green as it is savvy.
Now, you might be thinking, “But what about durability?” Here’s the scoop: with the right treatment, inexpensive timber can last just as long as pricier alternatives. You can treat your timber with preservatives to fend off rot and insects, ensuring your retaining wall stands strong for years to come.
And let’s not forget, timber can be a cost-friendly option, saving you even more cash if you’re handy with a hammer and nails. Here’s a quick rundown of how to make the most of timber in your retaining wall project:
- Choose pressure-treated timber for ground contact to resist decay.
- Consider the timber’s source – sustainably harvested wood is a plus for the environment.
- Plan for proper drainage behind the wall with a perforated pipe to prevent water damage.
Whether you’re edging a flagstone path or elevating the look of your outdoor floor space, timber offers a cost-effective solution that doesn’t skimp on style. Remember, a little creativity goes a long way.
You can stain or paint your timber to match your home’s exterior or let its natural beauty shine through. It’s all about making your outdoor space a place where you love to spend time, and a well-built timber retaining wall can help you do just that.
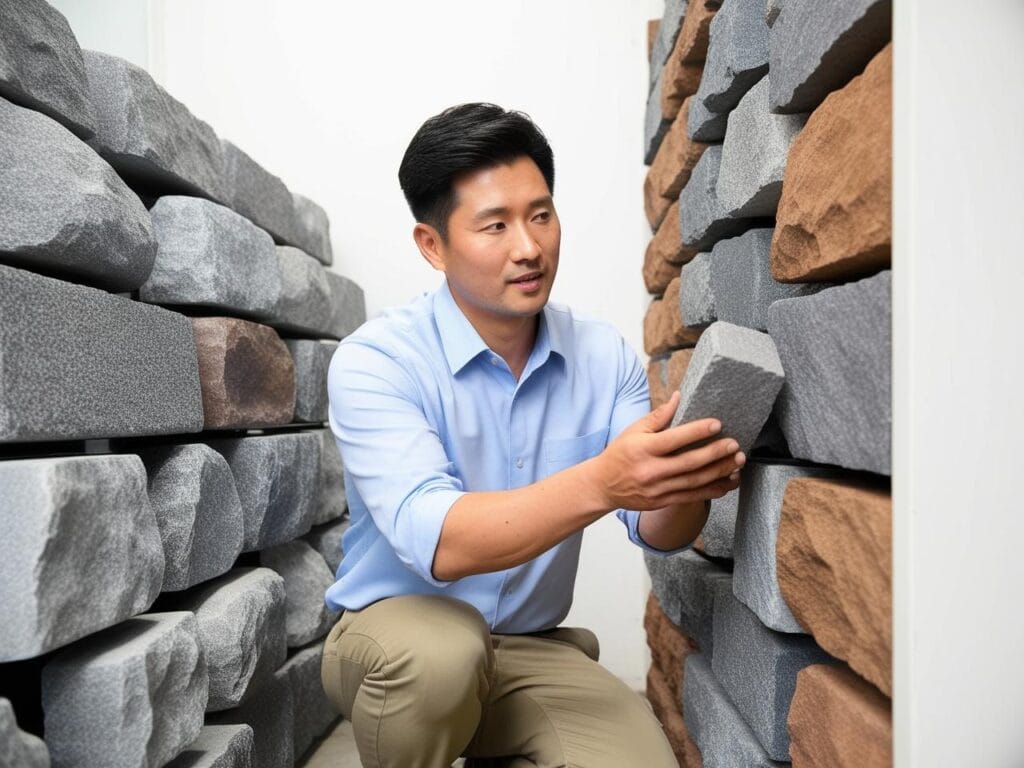
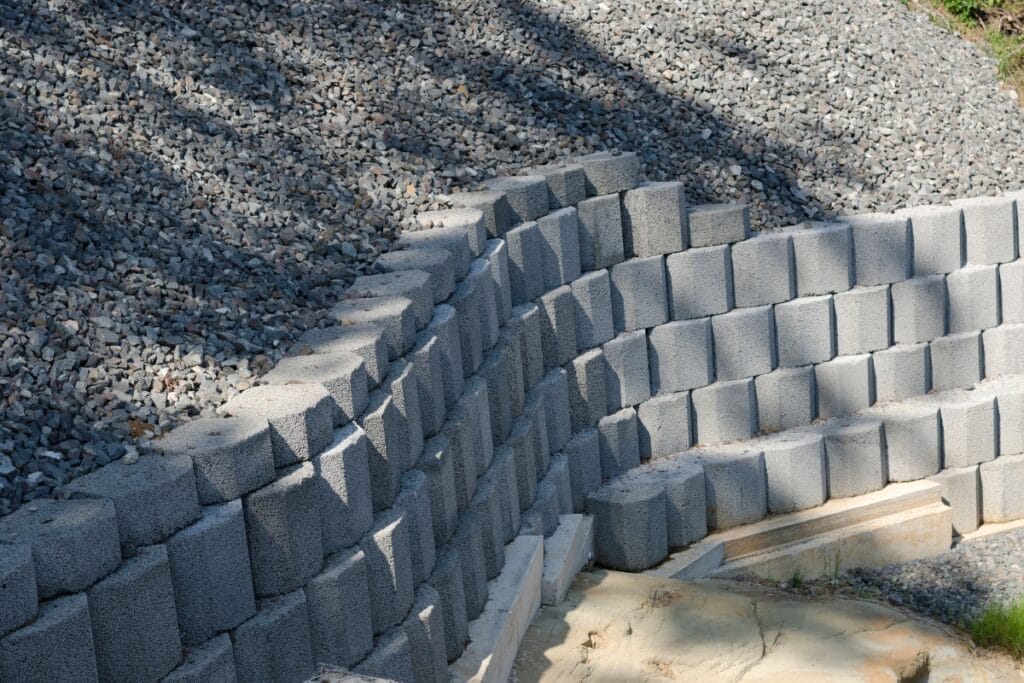
Considering Concrete Blocks or Bricks
When you’re diving into home improvement, especially in your outdoor space, concrete blocks and bricks are a smart pick for building a retaining wall on a budget.
They offer a blend of durability and beauty that can complement your deck or garden. Plus, they’re readily available and inexpensive, making them a go-to choice for your project. You can stack them up to create a sturdy barrier that holds back soil and mulch, ensuring your landscape stays pristine.
Concrete blocks and bricks not only bolster the structure of your retaining wall but also contribute to the overall aesthetic appeal of your outdoor area. They come in various colors and textures, allowing you to design a wall that matches your home’s style or adds a contrasting element to your garden.
And here’s a tip: you can often find these materials at a discount if you look for overstock or slightly imperfect pieces, which still work perfectly for a solid and attractive retaining wall.
Exploring Gabion Walls With Affordable Fill
Have you ever considered a gabion wall for your sloping backyard? It’s a savvy choice that’s as sturdy as it is cost-effective. Picture a series of wire cages, filled with rocks or even recycled concrete, all held together with rebar for extra stability.
This method not only adds a unique texture and color to your landscape but also stands up to the pressures of a hill, preventing erosion without the need for cement.
Imagine the sound of a waterfall cascading over a gabion wall, the water weaving through the stones, creating a serene ambiance in your garden. You can achieve this dreamy feature without splurging on expensive materials.
By using affordable fill like crushed stone or even repurposed rubble, you can construct a gabion wall that’s both functional and visually appealing, enhancing your outdoor space while keeping your budget intact.
Gathering Necessary Tools and Supplies
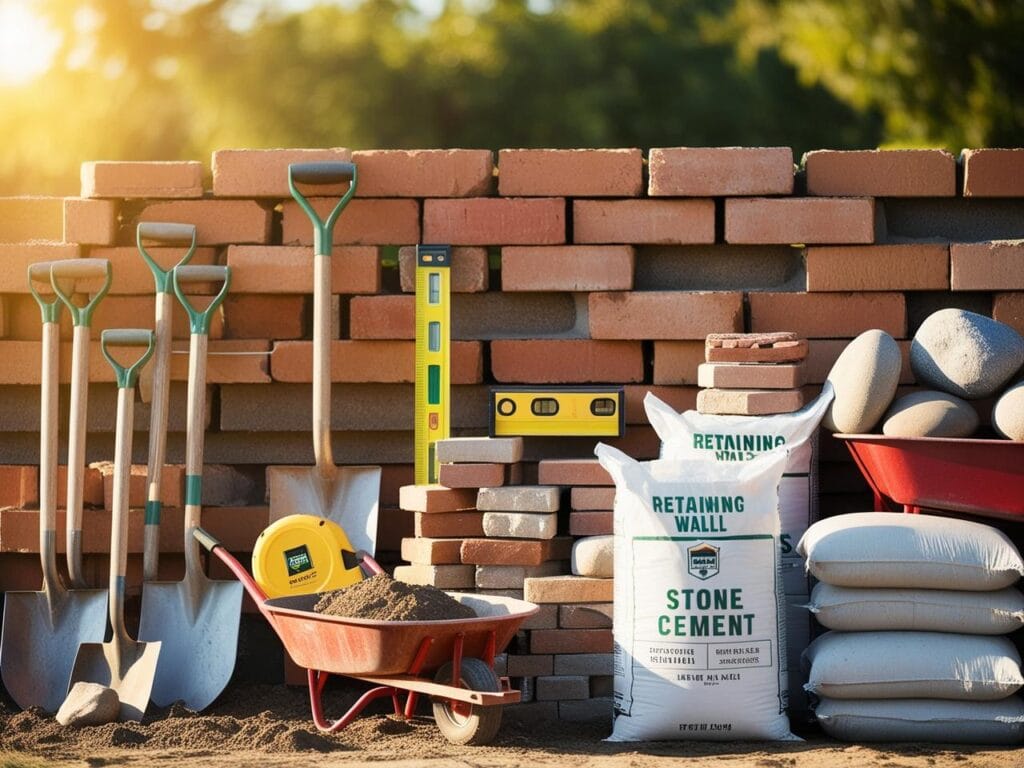
Ready to tackle that outdoor renovation with a retaining wall? You’ll need the right tools and a solid plan to calculate the materials required. Whether you’re figuring out how to build a rock wall or a stone wall, having a checklist of essential tools for construction is key.
Metal stakes, tile spacers, and a good old-fashioned shovel are just the start. In the sections that follow, you’ll get the lowdown on what you need and how to estimate quantities, ensuring your project is as streamlined as your budget.
Essential Tools for Construction
Before you start shaping your front yard into the envy of the neighborhood with a new limestone retaining wall, you’ll need to arm yourself with the right tools.
A sturdy shovel for digging, a mason’s chisel for splitting stones, and a level to keep everything straight are non-negotiables in your masonry toolkit. These essentials will help you tackle the terrain with precision, ensuring your wall is as functional as it is fetching.
Now, if you’re ready to get down to business, here’s what you’ll need to gather before the first stone is laid: a wheelbarrow for moving materials, a tamper for compacting soil, and string lines to maintain alignment.
These tools are your allies in transforming a pile of materials into a sturdy structure that stands the test of time:
- Wheelbarrow to transport stones and soil
- Soil tamper for creating a solid foundation
- String lines to ensure your wall is perfectly aligned
Calculating Quantities of Materials Needed
Before you lay the first stone of your retaining wall, you’ll want to crunch some numbers to avoid mid-project runs to the store. Start by measuring the length and height of the desired wall to determine the square footage.
Factor in the aesthetics of your home and the specific brand of materials you’re eyeing, as different brands may have varying coverage. Remember, it’s not just about the wall itself; consider the depth of the foundation and any additional features like a fountain that might influence the quantity of materials needed.
Always order a bit extra to account for mishaps or design changes, ensuring your project adheres to the local building code without any hiccups.
Calculating the right amount of materials is crucial, not just for your budget but also for maintaining the flow of your project. Here’s a simple list to guide you through the process:
- Measure the project area to determine the total square footage.
- Check the product specifications for coverage to estimate the number of units needed.
- Include a contingency of 5-10% extra materials to cover potential breakage or cutting errors.
By doing this, you’ll ensure that your outdoor space transformation goes smoothly, without the frustration of material shortages or unnecessary excess.
Step-by-Step Construction Guide
Ready to build a retaining wall that’s both budget-friendly and beautiful? You’ll start by laying a solid foundation, ensuring your wall has the strength to last. Next, you’ll learn how to place the first course of boulders or bricks, setting the stage for the layers to come.
As you add each new level, you’ll see your wall take shape, with wire or glass accents if you fancy. Don’t forget the trench for drainage—vital for wall health.
Finally, you’ll secure and finish your creation, ready to admire the length of your handiwork. Let’s get to it and transform your outdoor space!
Preparing the Foundation
Before you start dreaming about the perfect pergola or where to place your landscape lighting, you’ve got to lay the groundwork—literally. As a landscape architect would tell you, a solid foundation is key to any enduring structure in your backyard.
You’ll want to dig a trench to the recommended depth for your wall, typically around 4-6 inches for a small wall, and fill it with a layer of crushed granite. This creates a stable base that drains well, ensuring your retaining wall stands strong against the elements.
Now, let’s get your hands dirty. Compact that granite base until it’s as firm as your commitment to a stunning outdoor space. This step is crucial; it prevents your wall from settling unevenly and keeps your backyard looking sharp.
Remember, a well-prepared foundation not only supports the weight of your wall but also the dreams of beautiful landscape lighting and family barbecues for years to come.
Building the First Course
Alright, let’s kick things off with the first course of your retaining wall, which is like laying the first stone of your personal outdoor oasis.
You’ll want to start by laying down a level base of pine or other inexpensive timber, ensuring each foot of your foundation is solid and straight. This is the bedrock of your project, where precision pays off, setting the stage for the stone veneer that’ll soon grace your garden with its presence.
Once your base is ready, it’s time to lay the first stones or blocks. Think of it as the first brushstroke on a canvas that will transform your yard into a tranquil pond-side retreat. Make sure each stone is level and snug against its neighbor; this attention to detail now will save you headaches later. Here’s a quick checklist to keep you on track:
- Ensure the base is level and compacted.
- Place each stone carefully, checking for levelness.
- Use a rubber mallet to adjust the stones as needed.
With the first course down, you’re well on your way to creating a sturdy and stylish retaining wall that’ll make your outdoor space the envy of the neighborhood. Keep up the good work, and soon you’ll be kicking back by your pond, admiring the fruits of your labor in your very own backyard oasis.
Adding Subsequent Layers
As you stack the next layers of your retaining wall, think about incorporating spaces for herbs or small plants to add a living element to your structure.
This twist on traditional garden wall designs not only boosts your wall’s charm but also serves a practical purpose, allowing you to harvest fresh herbs right from your backyard. It’s a simple yet effective landscaping wall idea that marries form with function, giving you an edible garden that’s as sturdy as it is delightful.
When you’re piecing together paver wall ideas, remember that each layer should stagger over the one below, much like brickwork, to ensure stability. This technique is a cornerstone in block walls ideas, providing the strength needed to hold back the earth.
By following this pattern, you’re not just building a wall; you’re crafting a resilient and attractive feature that will stand the test of time and weather, all while enhancing the overall look of your outdoor space.
Ensuring Proper Drainage Solutions
When you’re piecing together your landscape stone wall ideas, don’t overlook the importance of drainage – it’s the unsung hero that keeps your wall standing tall.
A proper drainage system prevents water from building up behind your wall, which can lead to pressure and eventual damage. So, as you lay each landscaping block, consider installing a perforated pipe at the base or backfilling with gravel to ensure water can escape, safeguarding your decorative block wall ideas from the forces of nature.
As you explore landscaping ideas for stone walls, remember that good drainage is as crucial as the stones themselves. To prevent your hard work from being undermined by water, slope the ground slightly away from the wall and use landscape fabric behind the wall to filter sediment.
This way, your landscape rock wall ideas won’t just look good; they’ll also stand the test of time, keeping your outdoor space looking sharp and well-maintained.
Securing and Finishing the Wall
Now that you’ve stacked your stones and your retaining wall is almost ready, it’s time to secure and finish it off. If you’re wondering, “How do you make a retaining wall that lasts?” the answer lies in the details.
Capstones or top stones are the final touch that not only protect your wall from the elements but also give it a polished look. Make sure to apply a strong adhesive to keep these top pieces firmly in place, ensuring your landscaping wall designs withstand time and weather.
As you stand back and admire your handiwork, you might ask, “How do I build a retaining wall on a slope that stays put?” Well, anchoring your wall into the slope with a geogrid might be your best bet.
This reinforcement mesh integrates with the backfill and the blocks, providing extra stability to your structure. Here’s a quick table to summarize the steps you’ve taken to secure and finish your wall:
Remember, the key to a successful project is the finishing touches. So, take your time to ensure everything is secure.
After all, when you’re tackling questions like “How do you build a retaining wall?” or “How do I build a retaining wall that’s both sturdy and stylish?” it’s the final steps that make all the difference. With your new retaining wall in place, you’ve not only enhanced your outdoor space but also added value and charm to your home.
Enhancing the Aesthetics of Your Retaining Wall
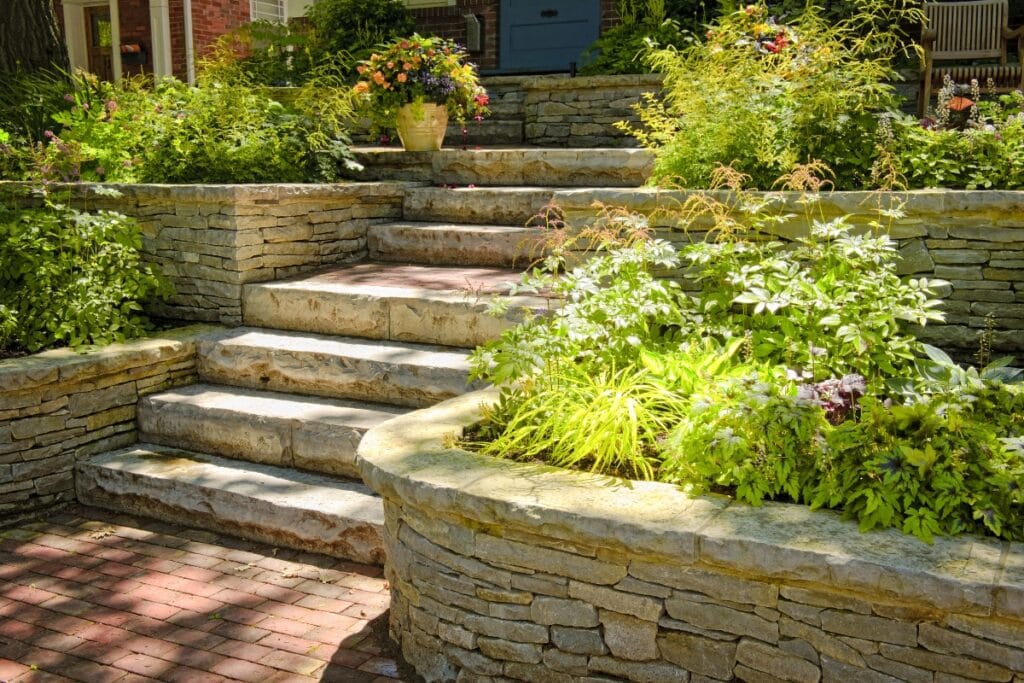
So, you’ve got the basics down on how to build a small retaining wall, but now you’re wondering how to make a retaining wall that’s not just functional, but also a knockout in the looks department. Easy!
We’re going to walk you through jazzing up that wall with lush plants and foliage, adding cozy seating for those long summer evenings, installing lighting to showcase your handiwork, and keeping it all looking fresh for years. Get ready to turn that sturdy structure into the star of your outdoor space.
Incorporating Plants and Foliage
Transforming your retaining wall into a lush garden is simpler than you might think. Start by selecting plants that thrive in your climate and will add a pop of color against the stone or timber.
Creeping vines, flowering perennials, or even small shrubs can turn a plain wall into a living tapestry, enhancing your outdoor space with vibrant textures and hues.
Consider the seasons when you’re choosing foliage for your retaining wall. You want to ensure year-round interest, so mix evergreens with seasonal bloomers. This way, you’ll enjoy a dynamic display that evolves with the seasons, keeping your backyard looking lively and inviting no matter the time of year.
Adding Functional Seating Areas
Imagine kicking back on a bench built into your new retaining wall, enjoying the sunset after a long day. By integrating seating into your retaining wall design, you’re not just maximizing space; you’re creating a cozy nook for relaxation and social gatherings.
It’s a smart way to enhance the functionality of your outdoor area while sticking to your budget, using the same inexpensive materials that make up the wall itself.
Here’s how you can turn your retaining wall into the go-to spot for outdoor lounging and entertainment:
- Design the seating to complement the wall, using materials like timber or pavers for a cohesive look.
- Ensure the seats are sturdy and comfortable, perhaps by adding cushions that can be stored away when not in use.
- Incorporate storage under the seats for garden tools or outdoor games, making your space both practical and inviting.
This approach not only adds charm to your retaining wall but also invites you and your guests to enjoy the fruits of your labor.
Installing Lighting Features
Lighting can transform your retaining wall from a simple structure to a striking feature of your outdoor space. By installing solar-powered lights along the top or within the wall itself, you create a warm ambiance that highlights the textures and contours of your design.
It’s a cost-effective way to make your garden glow after sunset, enhancing safety and creating a cozy atmosphere for evening gatherings.
Think about the dramatic effect of uplighting on your retaining wall, casting shadows and illuminating your plants in a way that brings your landscape to life at night.
You can easily install LED lights that are both energy-efficient and long-lasting, ensuring your outdoor space shines bright without adding much to your electricity bill. This simple addition not only boosts the visual appeal of your yard but also extends the hours you can enjoy it, all with a touch of elegance.
Maintaining the Wall for Longevity
To keep your retaining wall standing tall and looking sharp, regular checks and maintenance are key. You’ll want to inspect it for any signs of wear, like cracks or bulges, especially after heavy rain or freeze-thaw cycles.
Addressing these issues early can save you from bigger headaches down the road, ensuring your wall continues to enhance your outdoor space for years to come.
Don’t forget, vegetation can be both a friend and foe to your retaining wall. While plants add beauty, their roots can sometimes cause damage.
Keep an eye on any greenery growing close to your wall, and trim back roots that threaten its stability. This bit of gardening not only preserves the integrity of your wall but also keeps your outdoor haven looking pristine and well-manicured.
Frequently Asked Questions
What are the key benefits of installing a retaining wall?
Retaining walls prevent soil erosion, manage water runoff, create usable flat areas on slopes, and enhance property aesthetics, making them a smart investment for landscape functionality and value.
Which materials are both cost-effective and durable for retaining walls?
For retaining walls, concrete blocks and natural stone strike a balance between affordability and longevity, offering robust support and aesthetic appeal for your landscaping projects.
What tools will I need to build my own retaining wall?
To build a retaining wall, you’ll need a shovel, tamper, level, tape measure, landscaping fabric, gravel, and concrete blocks or stones.
Can I enhance the look of a retaining wall on a tight budget?
Absolutely, you can revitalize a retaining wall on a budget by adding plants, using paint, or installing decorative stone veneers for a fresh, appealing look.
Conclusion
Building a retaining wall not only enhances the functionality of your outdoor space but also adds a touch of elegance and structural beauty to your landscape. By choosing cost-effective options like timber, concrete blocks, or repurposed materials, you can construct a durable and attractive wall that suits your budget. Incorporating elements like built-in seating and strategic lighting can transform a simple barrier into a focal point for relaxation and entertainment. Regular maintenance ensures your retaining wall remains a beautiful and sturdy feature of your outdoor space for years to come.
At Legacy Landscape Design, we specialize in creating custom retaining walls that seamlessly blend durability with stunning design with our expert hardscaping services. Contact us today at 770-427-2026 or get in touch by filling out the form on our website. Let us help you transform your outdoor space with professional craftsmanship and personalized solutions!